> ## Documentation Index
> Fetch the complete documentation index at: https://cobo.com/developers/llms.txt
> Use this file to discover all available pages before exploring further.
# 使用 Postman 调用 Wallet-as-a-Service (WaaS) 2.0 API
> 使用 Postman 调用 WaaS 2.0 API 的指南,包括设置、认证和发送请求。
即刻安装 [Cobo WaaS Skill](/developers/v2_cn/guides/overview/cobo-waas-skill),在 Claude Code、Cursor 等 AI 开发环境中使用自然语言集成 WaaS API,显著提升开发效率 🚀
## **概述**
本指南介绍如何使用 Postman 调用 Wallet-as-a-Service (WaaS) 2.0 API。
## **前提条件**
* 一个 Postman 账户。
* 按照 [快速入门指南](https://manuals.cobo.com/zh-CN/portal/quick-start-guide) 中的说明设置您的 Cobo 账户并创建您的团队。如果团队已经设置好,请让您的团队管理员邀请您加入团队。
注意:本指南在所有示例中使用开发环境。请在 [https://portal.dev.cobo.com/](https://portal.dev.cobo.com/) 中创建您的团队。
* 您已经 [生成了 API Key 和 API Secret密文](/developers/v2_cn/guides/overview/cobo-auth#generate-an-api-key-and-an-api-secret) 并在 Cobo Portal 中 [注册了 API Key](https://manuals.cobo.com/zh-CN/portal/developer-console/create-api-key)。
## 创建一个集合
1. 从 [GitHub](https://github.com/CoboGlobal/developer-site/blob/master/v2/cobo_waas2_openapi_spec/dev_openapi.yaml) 下载 WaaS 2.0 API 规范。
2. 访问 [https://www.postman.com/](https://www.postman.com/) 或在本地计算机上启动 Postman。
3. 如果您还没有工作区,请[创建一个新工作区](https://learning.postman.com/docs/collaborating-in-postman/using-workspaces/create-workspaces/#create-a-new-workspace)。
4. 将您刚刚下载的 API 规范导入到工作区中。要了解如何导入规范文件,请参阅 [将 API 导入 Postman](https://learning.postman.com/docs/designing-and-developing-your-api/importing-an-api/)。
## 添加预请求脚本
使用 [pre-request-script.js](https://github.com/CoboGlobal/cobo-waas2-js-sdk/blob/master/src/PreRequestScript.js) 作为您集合的预请求脚本。此脚本会自动计算与认证相关的参数值并将它们添加为您的请求头。要了解如何将预请求脚本添加到集合中,请参阅 [重用预请求脚本](https://learning.postman.com/docs/tests-and-scripts/write-scripts/pre-request-scripts/#reuse-pre-request-scripts)。
## 添加环境变量
1. [创建一个环境](https://learning.postman.com/docs/sending-requests/variables/managing-environments/#create-an-environment)。
2. 将以下环境变量添加到您的集合中:
1. `privateKey`:将其设置为您的 API Secret密文(私钥)。
2. `apiKey`:将其设置为您的 API Key(公钥)。
3. `baseUrl`:将其设置为 `https://api.dev.cobo.com/v2`。
要了解如何在 Postman 中设置环境变量,请参阅 [编辑和设置环境变量](https://learning.postman.com/docs/sending-requests/variables/environment-variables/)。
3. 确保您已经 [选择了环境](https://learning.postman.com/docs/sending-requests/variables/managing-environments/#switch-between-environments)。
## 发送 API 请求
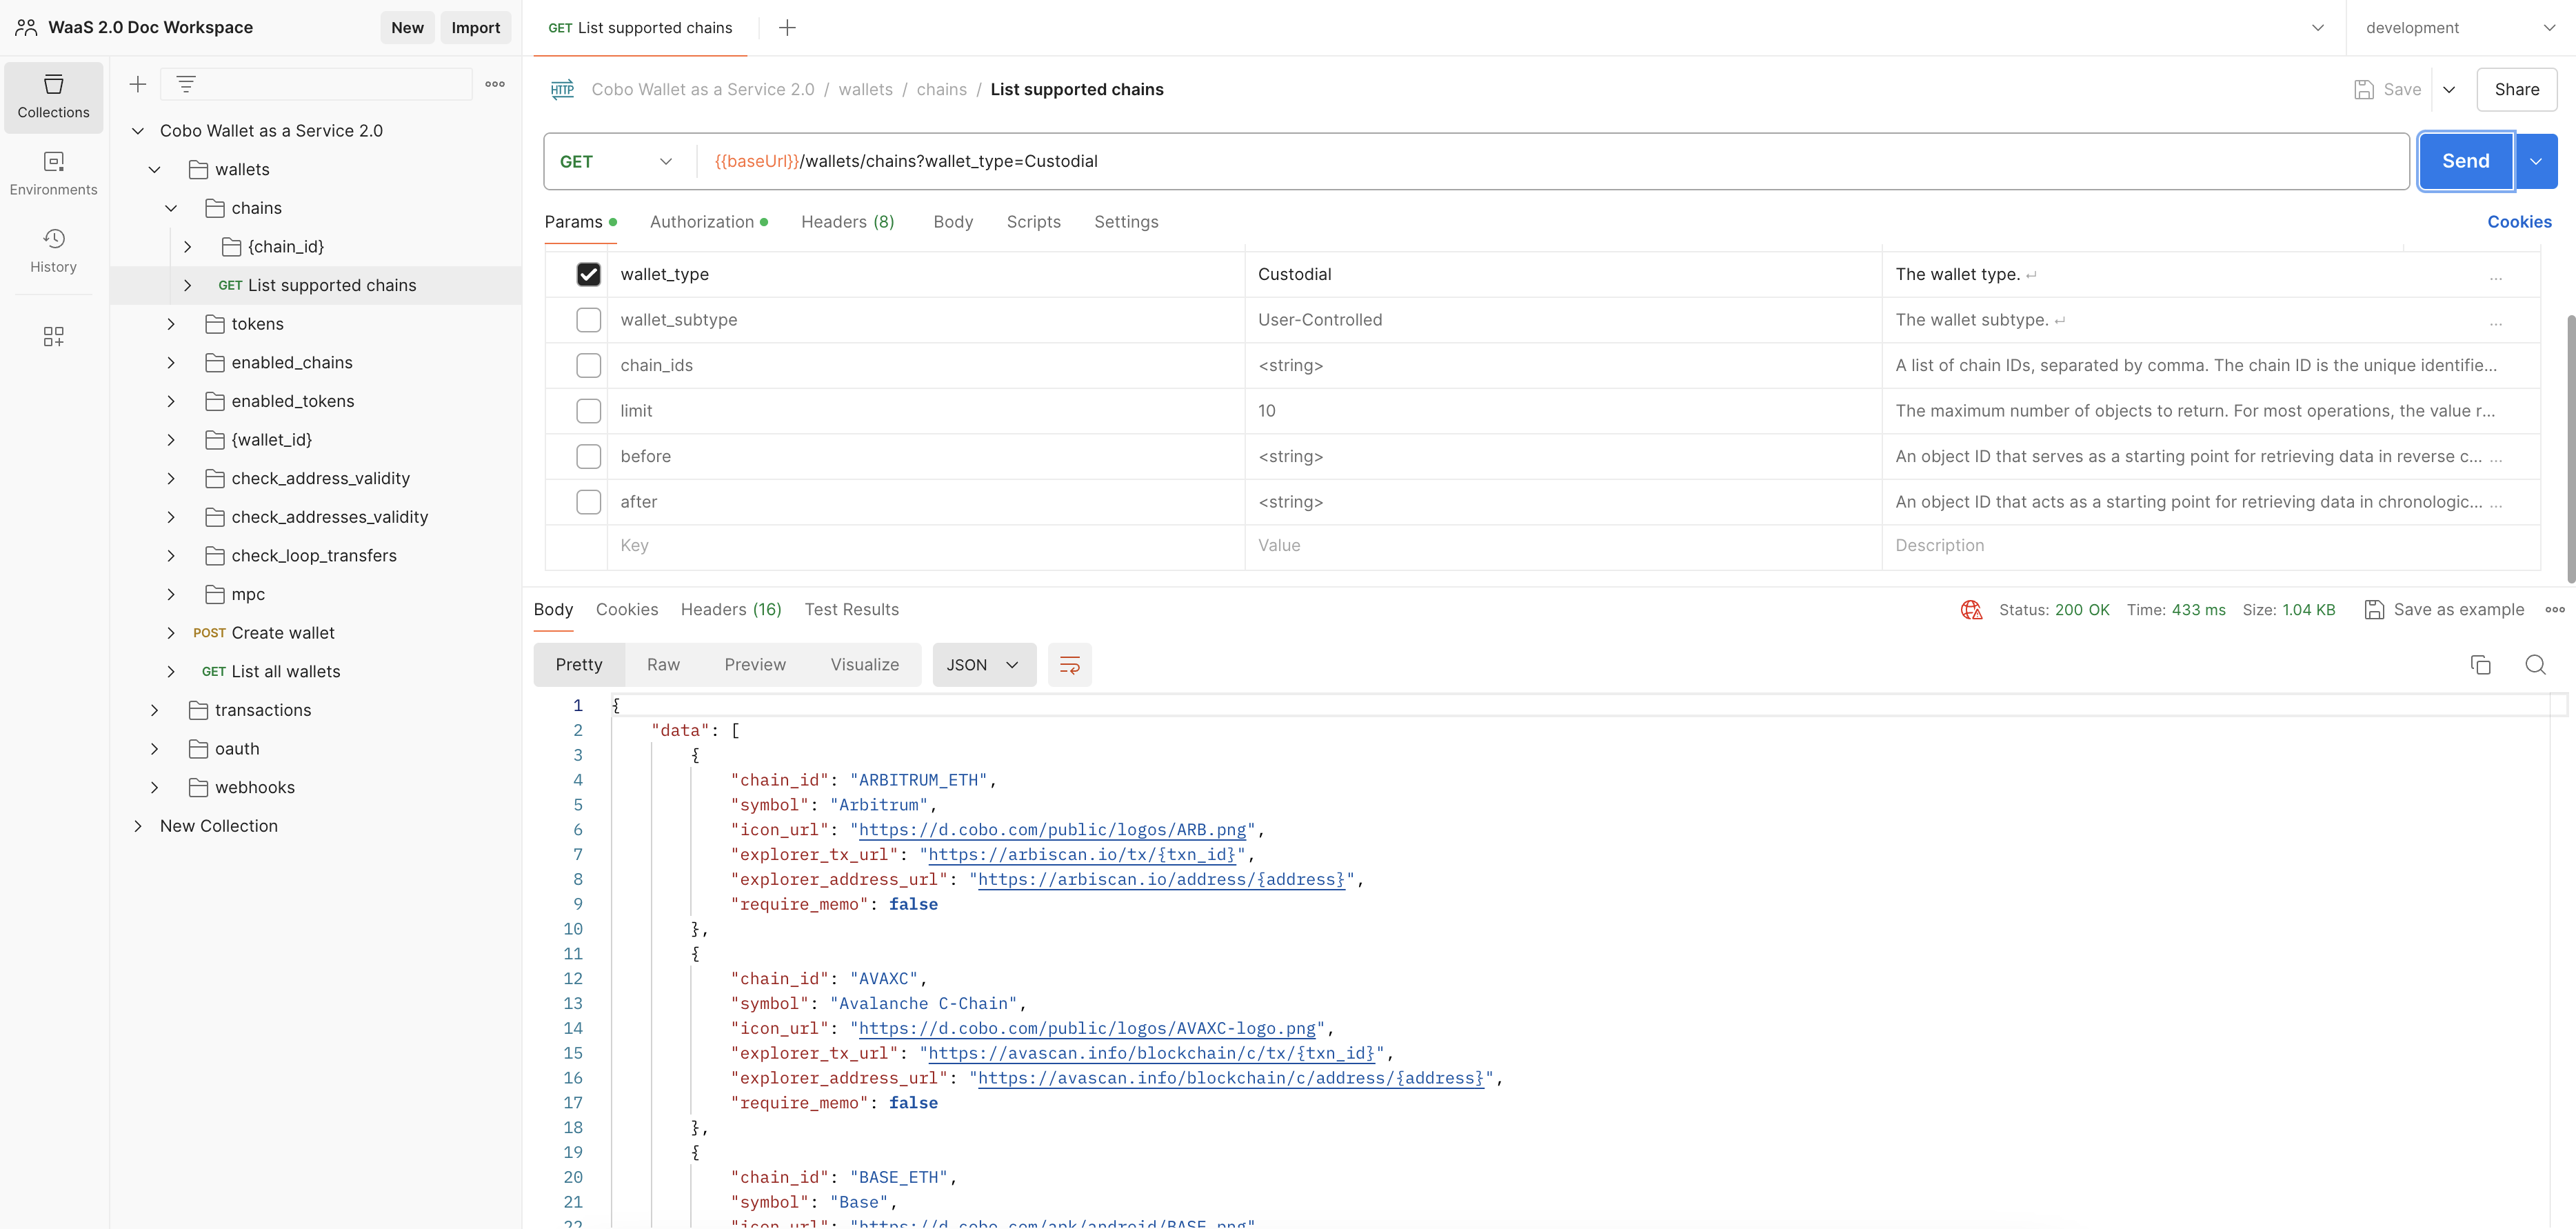
您已经完成了初始设置。下一步是 [发送 API 请求](https://learning.postman.com/docs/sending-requests/create-requests/request-basics/#send-a-request):
1. 选择一个操作。
2. 如果必要,请指定参数和包体数据。
3. 单击 **发送**。如果请求成功,您将在页面底部的响应部分中找到响应。