

- Query the chains and tokens you can use
- Set up a Safe{Wallet} and configure transaction policies
- Deposit and withdraw tokens
- Call a smart contract
This guide uses the development environment in all its code samples. It is recommended that you use the development environment to test your new features first before deploying them to the production environment.
Prerequisites
Before setting up a Safe{Wallet}, you must perform the following steps:- You have created an MPC Wallet (Organization-Controlled Wallet) either on Cobo Portal or via the WaaS API, and generated a wallet address. This wallet address will serve as the Delegate for your Safe{Wallet}.
- You have been assigned the Operator role or a custom role with equivalent permissions.
- Follow the instructions in Send your first request to set up your account and send your first API request to the WaaS 2.0 service.
- If you choose to use a WaaS SDK instead of manually writing the API requests, refer to the SDK guide corresponding to the programming language of your choice (Python, Java, Go, JavaScript to integrate the SDK into your project.
- Prepare some test tokens as you will need them when testing the deposit feature. To know which test tokens you can use, refer to Query chain and token information. In most cases, you can use XTN as the test token.
- It is highly recommended that you set up a callback endpoint to receive and approve withdrawal requests and a webhook endpoint to receive real-time notifications regarding transaction status updates and other events of your concern. To learn how to set up and register webhook and callback endpoints, refer to Introduction to webhooks and callbacks.
1. Query enabled chains
Before you begin setting up your wallet and generating deposit addresses, it’s important to know which chains and tokens you can use. To retrieve the chains you can use for Safe{Wallet} and their corresponding chain IDs, call List enabled chains and specify the query parameters as follows:wallet_type:SmartContract.wallet_subtype:Safe{Wallet}.
Sample code in Python
Sample code in Python
2. Query enabled tokens
To retrieve the tokens you can use for Safe{Wallet} and their corresponding token IDs, call List enabled tokens and specify the query parameters as follows:wallet_type:SmartContract.wallet_subtype:Safe{Wallet}.chain_ids: Specify the chain of your choice. You can also leave this parameter empty to query enabled tokens on all chains.
Sample code in Python
Sample code in Python
3. Set up a wallet
Set up a Safe{Wallet} on Cobo Portal by following the steps below:- If you already have a Safe{Wallet}, you can import it into Cobo Portal. You can also create a Safe{Wallet} directly on Cobo Portal.
- Set up a Delegate Key for your Safe{Wallet}.
4. Configure on-chain transaction policies
To allow Delegates to perform single-signature operations, you must set up on-chain transaction policies on Cobo Portal to automatically approve certain transactions initiated by the Delegates. In this guide, we will use the MPC Wallet address you have prepared in the Prerequisites section as the Delegate.- Configure policies to automatically approve token withdrawals and contract calls initiated via the MPC Wallet. Refer to the provided screenshot as an example.
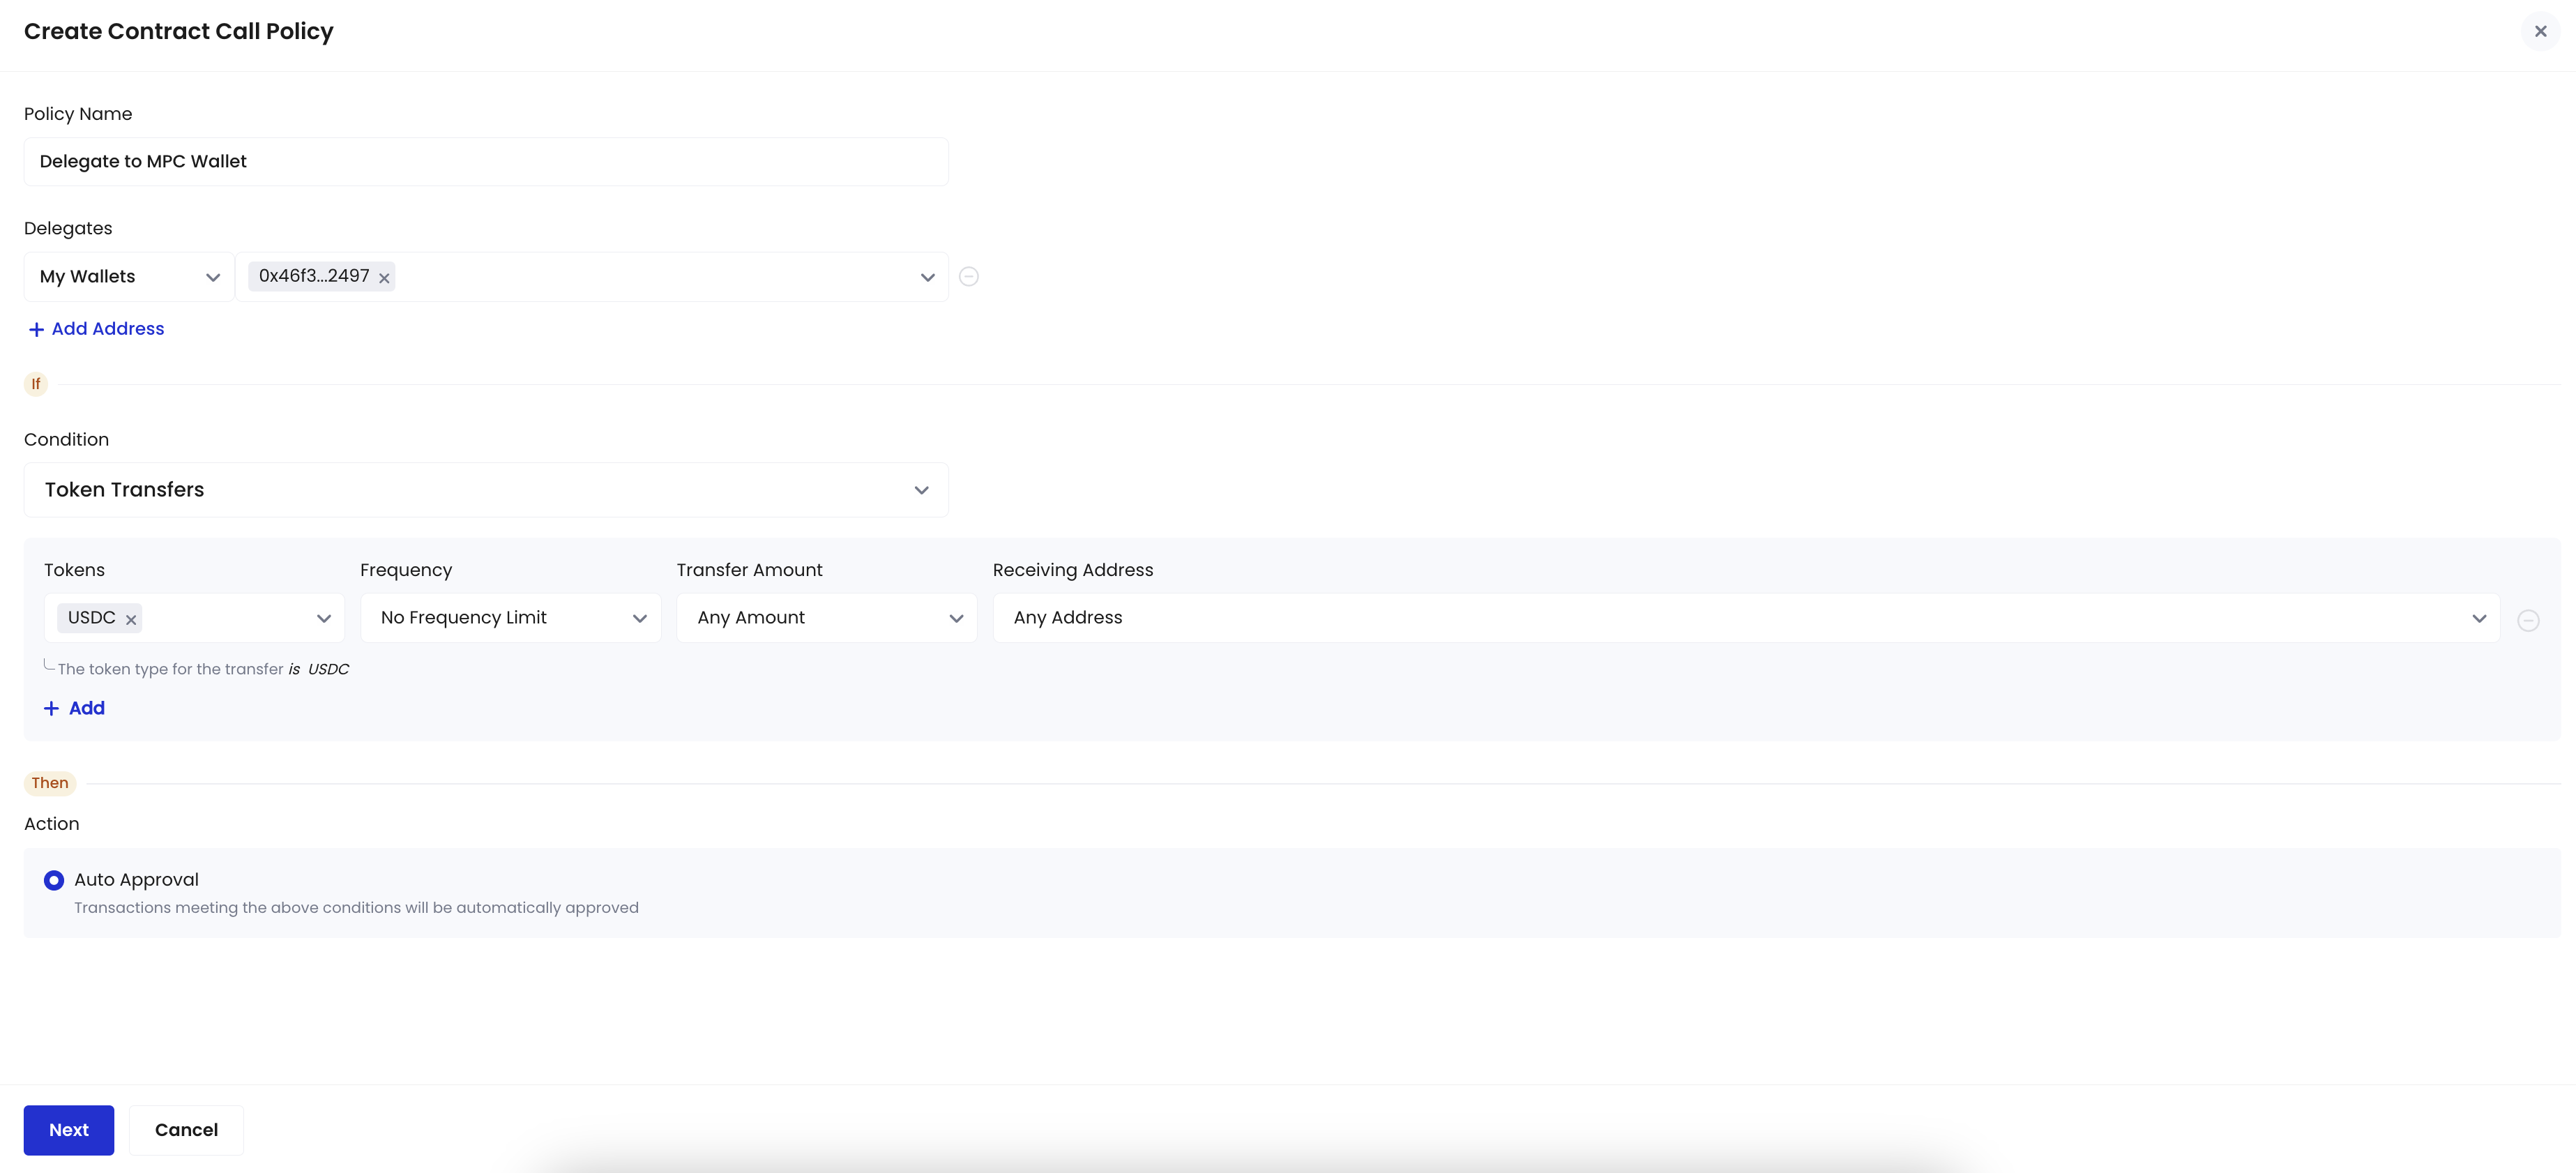
- A multi-sig confirmation from Safe signers is required. Click Submit to initiate the multi-sig transaction.
5. Deposit tokens
Follow the instructions in Deposit assets to deposit tokens into your Safe{Wallet}. After depositing tokens to the addresses you have generated, you can track the status of your deposit using one of the following two options. Compared with using API to query the transaction status, webhooks can give you real-time notifications and are thus the recommended option.Option 1: Use webhooks for real-time notifications
Webhook is an essential mechanism for the WaaS service to communicate with your application. After you register a webhook endpoint on Cobo Portal, the WaaS service sends push messages to the designated URL when an event occurs. To learn how to set up a webhook endpoint and register it on Cobo Portal, refer to Introduction to webhooks and callbacks. To track the status of your deposit, you can subscribe to the following webhook event types:- wallets.transaction.created
- wallets.transaction.updated
- wallets.transaction.succeeded
- wallets.transaction.failed
Option 2: Get transaction status by API call
To query the status of a deposit transaction, call the List all transactions operation and set the query parameters as follows:types:Deposit.statuses:Confirming, Completed. If you are depositing from an external address, you will be able to query the transaction details when the transaction is waiting for the required number of confirmations or when it is successfully executed.wallet_ids: The ID of the wallet you have created in the first step. You can get the wallet ID from the wallet list on Cobo Portal.
Sample code in Python
Sample code in Python
6. Withdrawal tokens
Now that you have tokens in your wallet, it’s time to try withdrawing them.Set up a callback endpoint
To enhance the security of your transactions, it is highly recommended that you set up a callback endpoint to receive and approve withdrawal requests. Once you initiate a withdrawal using the WaaS 2.0 API, the callback endpoint will receive a callback message containing the transaction details. The transaction will proceed only if you approve the withdrawal request. To learn how to set up a callback endpoint and register it on Cobo Portal, refer to Introduction to webhooks and callbacks.Withdraw tokens
- To withdraw tokens from your Safe{Wallet}, you should first get its wallet ID from Cobo Portal. Hover over the wallet in the wallet list, copy the wallet ID, and save it for future reference.
-
Call List Delegates to retrieve the available Delegates. Specify the parameters and properties as follows:
- Path:
wallet_id: The wallet ID of your Safe{Wallet}.
- Request body:
request_type:Transfer
- Path:
-
Call Transfer token to initiate the withdrawal with the Delegate. Specify the properties in the request body as follows:
request_id: Use a unique ID to track the transaction request.source:source_type:Safe{Wallet}wallet_id: The wallet ID of your Safe{Wallet}.address: The address of your Safe{Wallet}. You can call the Get wallet information operation to retrieve the address.delegate: The information of the Delegate. You can call the List Delegates operation to retrieve the applicable Delegates.
token_id: The token ID.destination:destination_type:Addressaccount_outputaddress: The receiving address.memo: The memo, if applicable.amount: The transfer amount.
category_names: The custom category for you to identify your transactions.description: The description of the transfer.
Sample code in Python
Sample code in Python
Confirm the withdrawal
If you have set up a callback endpoint, after you initiate the withdrawal transaction, your callback endpoint will receive a message containing the transaction details. Check if the transaction meets expectations, and respond with a success status code (200 or 201) and a response body ofok to approve the transaction. To learn more about handling a callback message, see Handle messages.
Monitor the withdrawal status
In addition to webhook events, you can also call the Get transaction information operation to query the status of the transaction. Set the path parametertransaction_id to the transaction ID returned in the response of the previous withdrawal request.
Sample code in Python
Sample code in Python
7. Call a smart contract
This section introduces how to call a smart contract using your Safe{Wallet} through the Delegate.- Get the wallet ID of your Safe{Wallet} from Cobo Portal. Hover over the wallet in the wallet list, copy the wallet ID, and save it for future reference.
-
Call List Delegates to retrieve the available Delegates. Specify the parameters and properties as follows:
- Path:
wallet_id: The wallet ID of your Safe{Wallet}.
- Request body:
request_type:ContractCall
- Path:
-
Use the Call smart contract operation to call the smart contract with the Delegate. Specify the properties in the request body as follows:
request_id: Use a unique ID to track the transaction request.chain_id: The ID of the chain on which your Safe{Wallet} operates. You can call the Get wallet information operation to retrieve the information.source:source_type:Safe{Wallet}wallet_id: The wallet ID of your Safe{Wallet}.address: The address of your Safe{Wallet}. You can call the Get wallet information operation to retrieve the information.delegate: The information of the Delegate. You can call the List Delegates operation to retrieve the applicable Delegates.
destination:destination_type:EVM_Contractaddress: The destination address.value: The transfer amount.calldata: The transaction calldata.
category_names: The custom category for you to identify your transactions.description: The description of the transfer.
Sample code in Python
Sample code in Python