Disclaimer: This article contains AI translations and should only be used as reference. Contact Cobo’s support team through [email protected] if you have any questions.
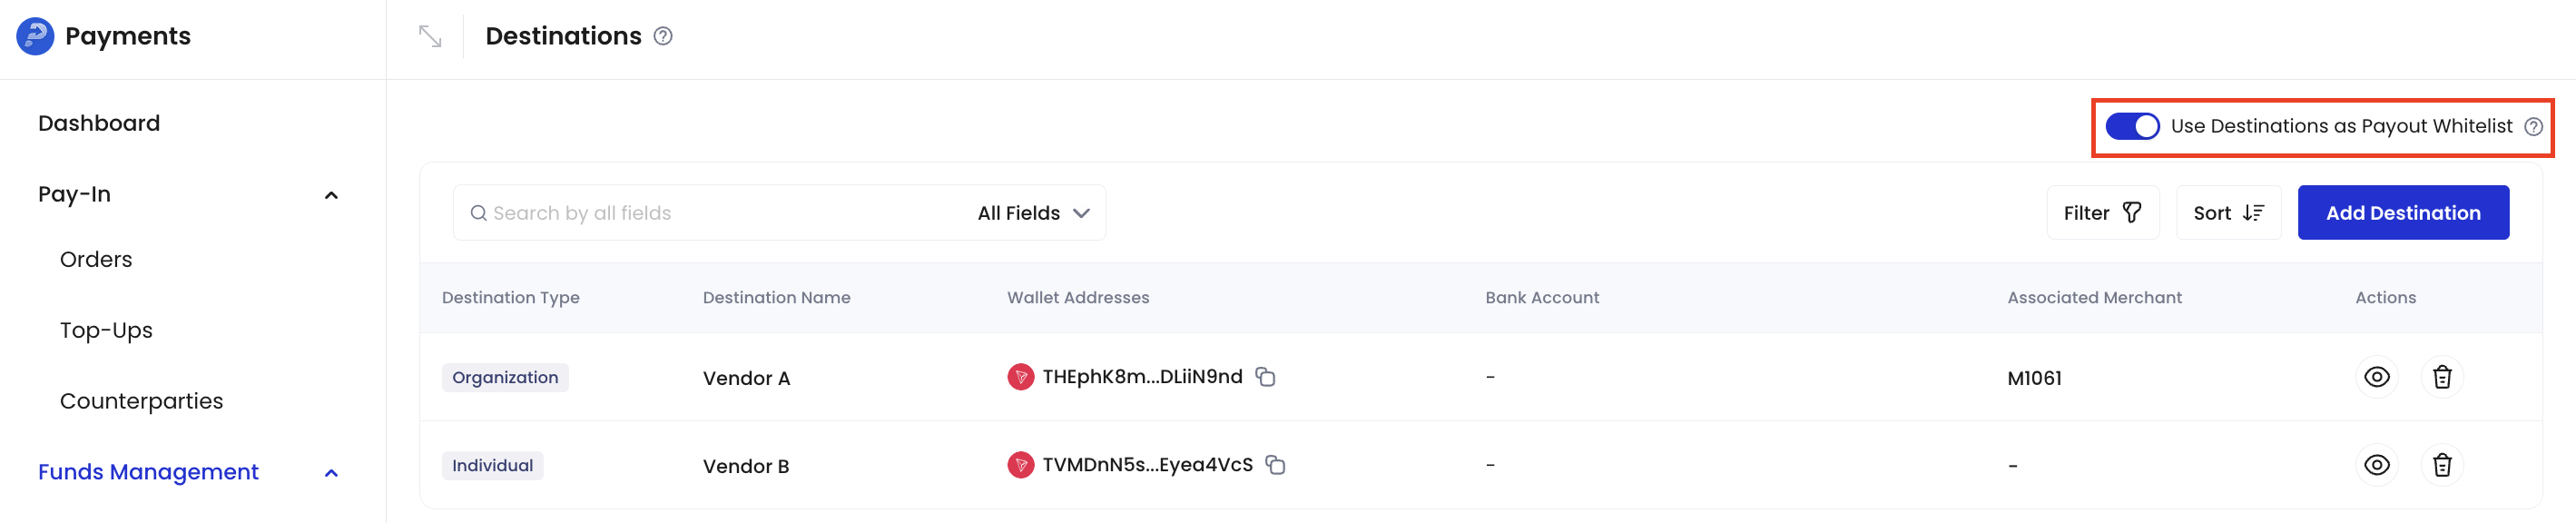
- Destination management: Consolidate cryptocurrency wallet addresses and fiat bank accounts under a single entity.
- Payout whitelist: Use destinations as a whitelist for crypto payouts, restricting fund transfers to approved wallet addresses only.
- Merchant association: Associate each merchant with a specific destination for easier payouts. Note that direct off-ramp settlement to merchant bank accounts is not currently supported.
- Risk control: With Cobo Premium integrated, you can run address risk screening and identify risky wallet addresses before adding destinations or initiating payouts.
- For off-ramp, you need to register a bank account with a name that matches your company’s legal entity name, and it must be approved by Cobo’s operations team before it can be used for payouts.
-
For crypto payouts, you can flexibly manage the allowed transfer addresses through the Use Destinations as Payout Whitelist toggle:
- If enabled, transfers are only allowed to registered destinations (wallet addresses);
- If disabled, you can freely enter destination addresses or select from registered destinations.
Add a destination
You can add destinations in the Payments App, including wallet addresses and bank accounts.Permission requirements
Only Payment Admin and Admin roles have permissions to create, edit, and delete destinations. Payment Member has view-only access and cannot make modifications.Steps
- Log in to Cobo Portal development environment or production environment.
- In the left navigation bar, click Apps, then click the Payments card to launch the App.
- In the App’s left navigation bar, click Funds Management > Destinations.
- Click the Add Destination button in the upper right corner.
- In the pop-up form, fill in the wallet address and/or bank account information to be registered.
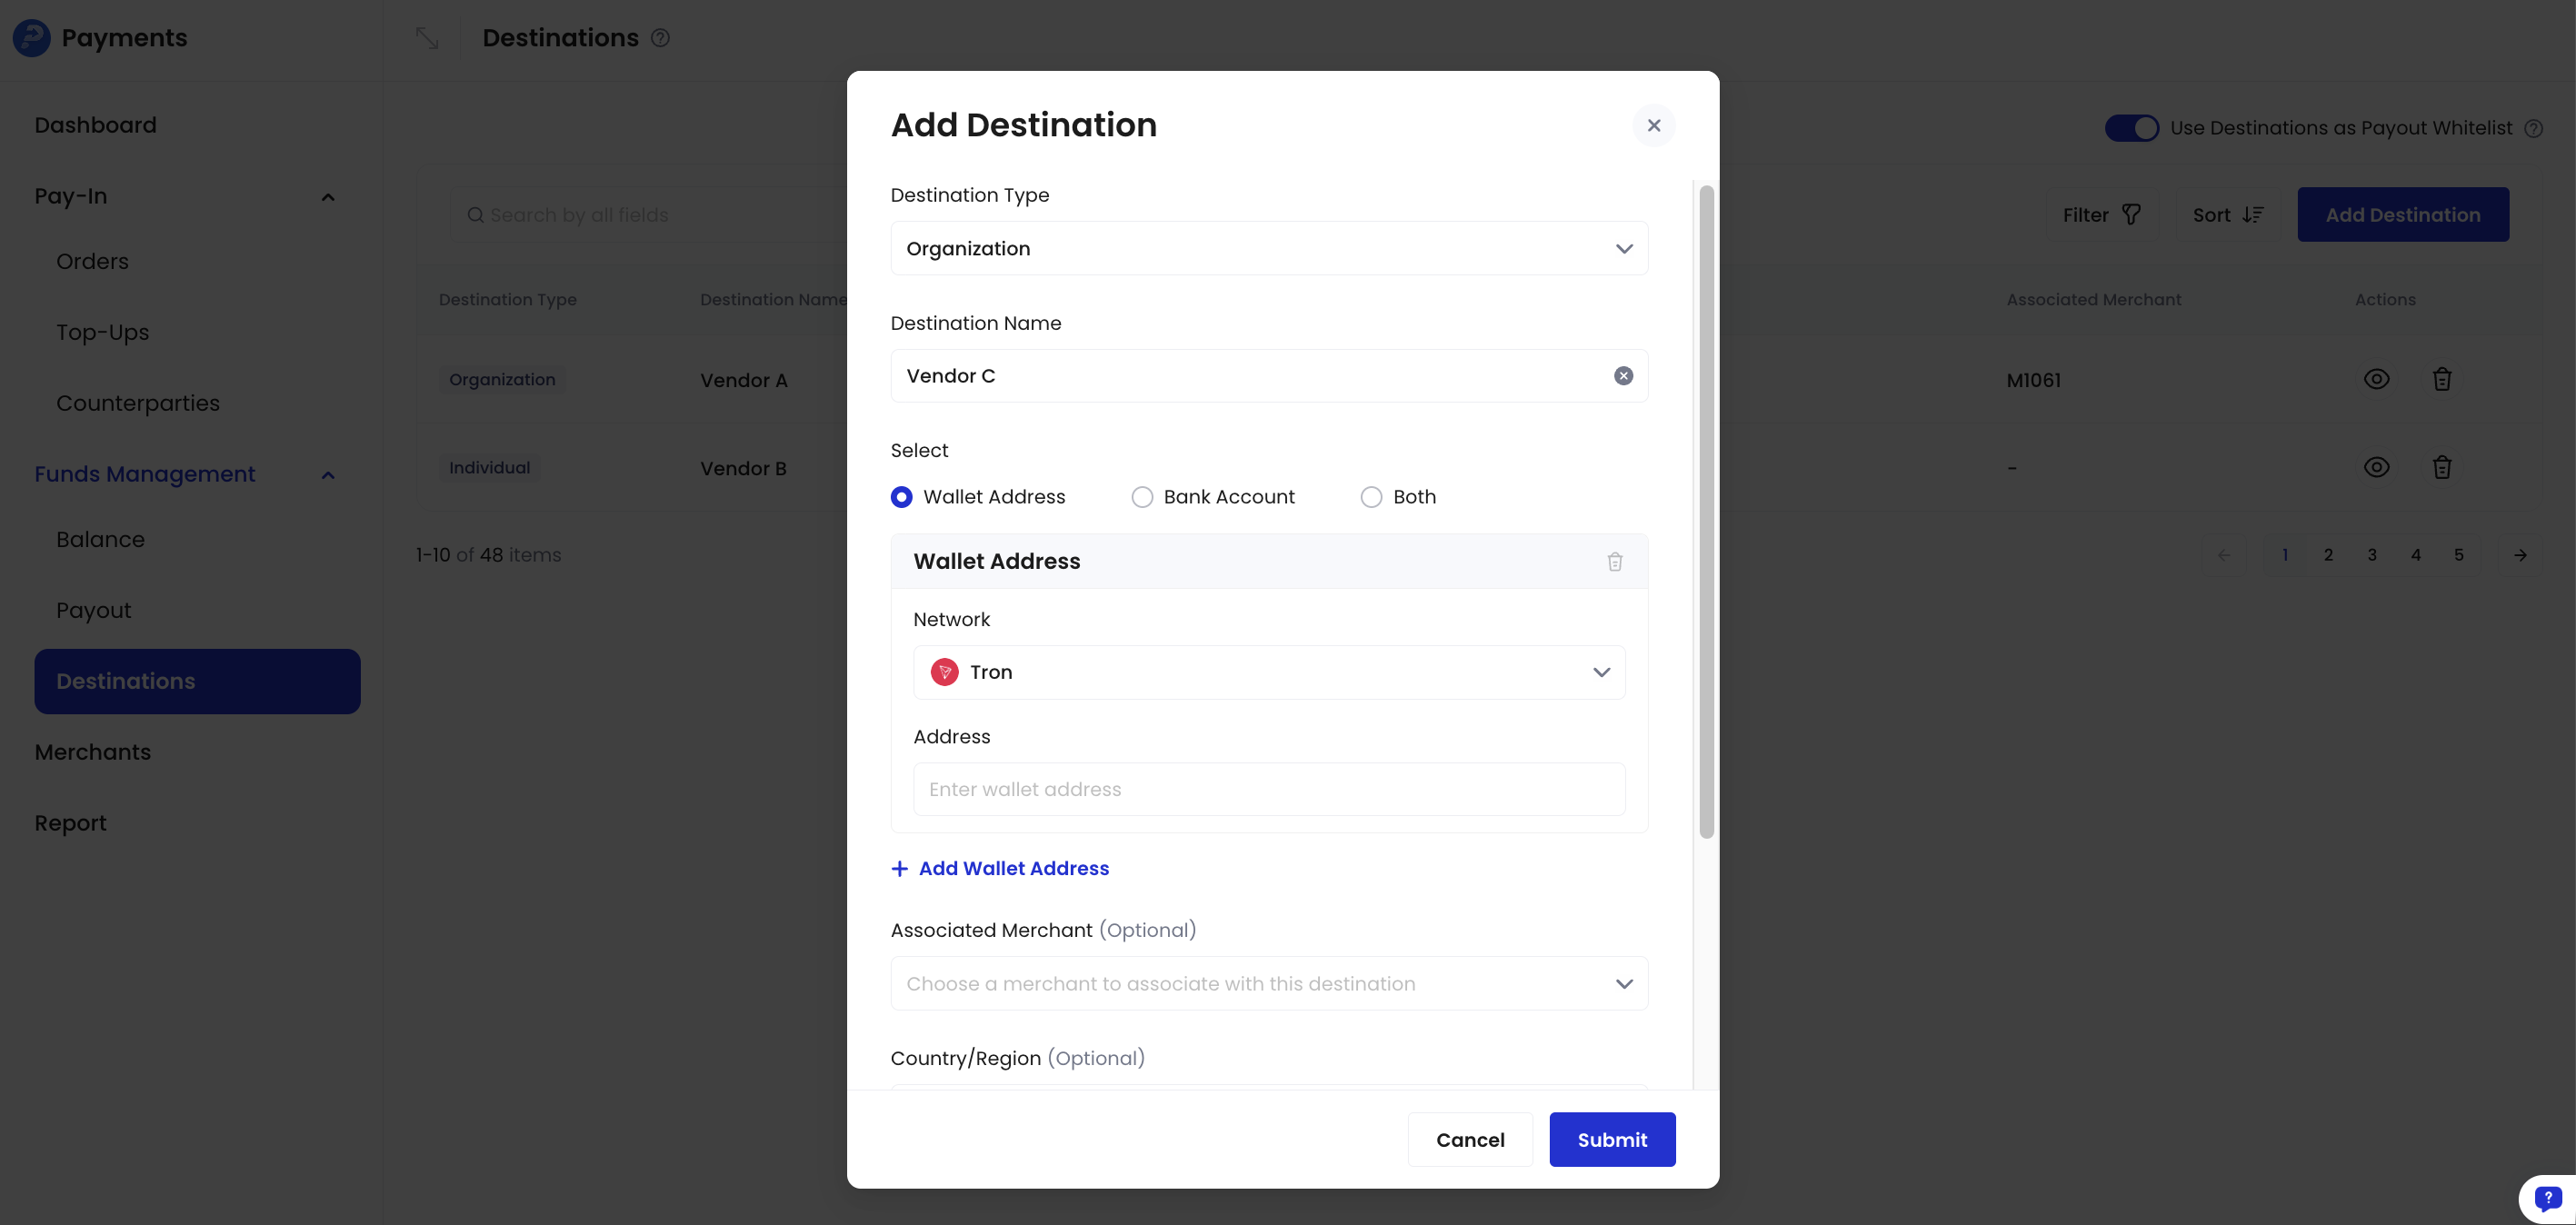
- If registering a wallet address, you can optionally associate it with a specific merchant. Once associated, the system will automatically select this wallet address as the destination when initiating payouts for that merchant, improving operational convenience and accuracy.
- When adding a bank account, ensure the account name matches your company’s legal entity name.
- Click Submit and complete the identity verification.
- If you registered a bank account, you need to wait for approval from Cobo’s operations team before using it for payouts.